Thursday, July 30, 2009

Spruced Up Laundry Room...

Laundry is never a fun chore, and when your laundry room is dreary, it makes the job even worse. My laundry room-or closet, actually-is not the prettiest part of our house. It is quite utilitarian, and was in dire need of some sprucing up. It is right off the dining room, and a room that I see on a daily basis. Why shouldn't it be pretty?
I would love to paint the walls, but I can't get the washer and dryer out myself. I had a great chance last year when the water heater sprung a leak and everything was moved out of there, but we were too focused on getting the mess dried up and new flooring put in to think about paint. So I'm having to rely on some smaller ways of making that room less of a dungeon.


The first way is by putting things in pretty containers. Now mind you that I'm on a sort of self-imposed decorating spending freeze (at least until the end of August when I get a paycheck again!), so I'm not spending any money for this job. Last month, when we cleaned out the garage, I found a box of Mason jars on one of the shelves. I thought one of them would be great for holding my Clorox 2 powder. I use a pretty sugar spoon to scoop it out.
I also found a metal container to hold my clothespins and a blue Dollar Tree bin for cleaning cloths and odds & ends. I pared down some of the cleaning supplies, moving some of the less-often-used to the garage.
Then I made this:
It was very easy. I took a scrap piece of plywood from the garage, painted it red, then used Lindsay's newspaper transfer method to apply the letters. They got painted gold, and hangers put on the back. Took me less than an hour.
It still may not be as pretty as I'd like, but even the little things make one of my daily chores a little more bearable.

Tuesday, July 28, 2009

Plate It Up...

This week I've been trying to finish up some projects before I have to go back to work on Friday (what kind of sadistic school district plans the first day of inservice on the last Friday of summer vacation?). We're going to work on that mystery project in the kitchen tonight, so while Hubby is at work this morning, I tried something new.
While the Megster was cleaning out her closet last night (hard to believe, I know!), she found a platter (don't ask-who knows why there was a platter in a 10-year-old's closet). Now this wasn't sporting the prettiest of patterns, in fact, it was downright ugly. I would show you how ugly, but as usual, I was too intent on starting my project that I forgot to take the "before" picture. You'll just have to take my word for it. I wasted no time in spray painting it "sand" (Do It Best brand), which is a creamy off-white.
Then, I tried a new trick I learned last night. I was trying to figure out how I was going to transfer an "S" to my plate, and not 10 minutes later, I find this gal's blog, in which she explains exactly how to transfer patterns without carbon paper. So I tried it, and it worked perfectly. Thanks Lindsay!
I didn't have any black craft paint, so I had to use spray paint that I sprayed out in a little puddle on a foam tray. I'm not the steadiest painter in the world, and I just noticed a rough place I need to fix (I think I can fix it with a Sharpie), but I think its not too bad. I have no idea yet where I'm going to put it, but I'll think of something!

Saturday, July 25, 2009

Just a Little Bit of Fancy...

So I painted up my thrift store tray the other day, but it was missing something. I tried scrapbook paper in the bottom, but I didn't have anything that really worked. So last night I got inspired by something I saw online: harlequin diamonds. I set out to learn how to measure and mark off the lines and found this great site with a calculator that tells you how far to space your lines. However, when I got up this morning and started, I decided that my mind was way too fuzzy for all the math, so I just eyeballed it, all the while hearing the Nester's voice in the back of my mind reminding me that "it doesn't have to be perfect to be beautiful!"
However, just as I was about to paint, I looked at my tray and realized that I didn't have a harlequin diamond pattern, I had a lattice pattern. After staring at it for a while, I decided that I kinda liked the lattice pattern, (not to mention that there was no way I was tearing off all that tape and starting over!), so I went ahead and put the paint on. I wanted a slightly aged look, so I left the paint a little streaky.
It may not be what I set out for, and the paint lines certainly aren't perfect, but I really like how it turned out.


Friday, July 24, 2009

"Tray" magnifique...

Mom kept the kids for me yesterday while I went to get my hair cut, and she told me to "take my time" getting back. Far be it from me to not mind my mother, so I took the chance to visit a little thrift shop in her town. I found another small silver tray (50 cents) and a wood tray that I've been looking for ($1). It was plain, and a little shorter than I would have liked, but for a buck-I can live with it!

As usual, I forgot to take a before picture, but it is like this (only shorter):I took it out to the garage and gave it a coat of cream colored spray paint (Do It Best-Sand). I must tell you, my family was astounded that I didn't use black! Between you and me, I think I did the off-white just to throw them off a little.
We have a few projects planned for the weekend, too. I'm trying to finish the project that I alluded to here, and The Megster has decided that she wants to build a birdhouse. So The Hubby and I are donning our Bob the Builder hats and tool belts for a busy weekend!

Wednesday, July 22, 2009

DIY Thursday...

Today is Kimba's DIY Day!
DIY Day @ ASPTL
I thought I'd share the toile picture frame that I made for my master bathroom.
I started with one of these mini frames that a friend gave me:

I used Tacky Glue to glue on toile scrapbook paper. Talk about some careful cutting! There wasn't much room for error here!
Then I added a ribbon to hang it by. The ribbon is attached with a couple of thumb tacks:
Everything I needed I already had laying around. Total cost for this project: free! The only thing I have to do now is find something small enough to fit inside the frame.

Click on over to Kimba's and join the party!

Mystery solved...

Remember this jar? Paula said that it was similar to
a sugar bowl her mother had. That made much more
sense than the "shaving cream jar" idea (sorry hubby!).
Then this morning, I noticed how similar its design was to a Pfaltzgraff soup tureen that I already had in my kitchen. I couldn't make out the stamp on the
bottom of the little jar, so I looked it up on the Pfaltzgraff website and sure enough, Paula was right!
The sugar bowl and tureen are part of the Heritage pattern, and the bowl sells
for $9.99 directly from them ($14.50 retail). This just made me even more excited, since I paid a whopping 75 cents for it!
I just love a bargain!


Monday, July 20, 2009

Monday's Thrifty Treasures...

I didn't get to go yard sale-ing this past weekend since we had a day trip planned with my parents, but I did get to go a couple Goodwill stores today after my doctor's appointment. I did find a few treasures while there.

One of the first things I zeroed in on at the first GW store was something I've been looking for ever since the first time I saw Kimba's furniture rehab-a lonely pair of dining room chairs that had seen better days. I didn't want both; just one would do, and at the bargain basement price of $5, who could resist? Me, that's who. Believe it or not, the woman who had been looking for months for a chair to rehab passed on it. I couldn't decide if the sort-of-fakeish-wood would be easy to work with, and I wasn't sure the seat was easily removable for padding that I would add. I guess I made the right decision by not getting it. Before I had even left the store someone bought them. I guess they needed a couple of chairs worse than I needed one to spray paint!

I was not to be out done, however! I did find a few things to share with you.

I found this jar with a lid for 75 cents. I'm not sure what it was used for (hubby thinks it was a jar that held shaving cream in it), but it will look nice in my kitchen.

I also found a couple silver trays. The oval shaped one (50 cents) is going to get the chalkboard paint treatment, and I have just the place for it to hang in my master bathroom.

The other one ($1) is actually the bottom half of a butter dish, I'm thinking. It is heavier and looks more like real silver than the oval one. Silver plate, probably. I'm thinking about putting some white pebbles in it and using it for a soap dish, also for the master bath.

I also got the little G-Man a shirt and a pair of warm-up pants for $1.50 each. Neither of them look as though they were hardly worn.

What did you get this weekend? Hop over to Rhoda's and join her thrifting party!


Friday, July 17, 2009

A New Project...

Just look what my sweet hubby brought me from work yesterday:

Can you guess what I'm going to do with it?

I'll give you a hint. It has something to do with these:


Thursday, July 16, 2009

My Favorite Things: Living Room

My $8 find at Hobby Lobby:
Hop on over and visit my hubby's blog, In the Kitchen with Derek!


Tuesday, July 14, 2009

Monday, July 13, 2009

A New Name...

C'est La Vie is now "Welcome Home". Along with the new name and new look, I hope to bring you new features soon, such as recipes. Stay tuned!

Sunday, July 12, 2009

My latest mistreatment...

A while back, I rearranged our living room just a bit. Everything had been in the same place ever since we have lived in this house (10 years), so I thought it was time to try something new. The only problem was, that with the new arrangement, the couch had to be pulled out from the wall to center it. That left about an 18" space that needed to be filled. Now of course I would have loved to have gone down to my local shee-shee-poo-poo furniture store and bought something, but, well, I'm too frugal (and my wallet too empty) for that, so I got creative.

I made the base out of an old aquarium stand that has been sitting in my parents' garage for, oh, at least 28 years. Normally Mom and I would stand and shake our heads with our lips pursed in contempt for Dad's pack-ratting, but in this case, it paid off for me! The stand was just the right height. All it needed was a solid top. For that, I used a piece of plywood that hubby had laying in our garage. A few measurements and cuts and I had a sofa table!


The table cloth is one I had in the linen closet, the lamp- $9 from Wally World, and the rest I had around the house. It fills the space just perfectly.

Don't forget Kimba's DIY Day Party!

Saturday, July 11, 2009

Wanna dish?...

If you know me, you know that I have had a long-time love affair with dishes. And if there's any doubt, all you have to do is look around my house.

The master bedroom:

The dining room:

The kitchen:

The living room:


Go check out Hooked on Fridays and let everyone know what you're hooked on!

Friday, July 10, 2009

The Master Bath...

The master bath is almost finished! This has been a long, drawn-out process that at times, I don't think will ever get done. We're in the home stretch now, though. It will all be done as soon as we get some flooring. We had quite an ordeal with the flooring: ordering tile, ripping up part of the old stuff, waiting for ages for the tile, walking on plywood subfloor in half the room, finding out the store can't get the tile...well, you get the picture.
Otherwise, the room is shaping up. We have paint ("Prussian Blue" by Porter), the new light fixture (brushed nickel) and mirror (only $30, by the way)


My Big Lots mercury-like vase and a frame with toile that matches the shower curtain...

My $6 window I bought at my favorite antique store, layered with a repurposed frame I spray-painted and hung by a ribbon.


Frames I bought at the Dollar Tree with scrapbook paper instead of photos:

Now, if we could just get a floor...


Thursday, July 9, 2009

The Guest Bathroom...

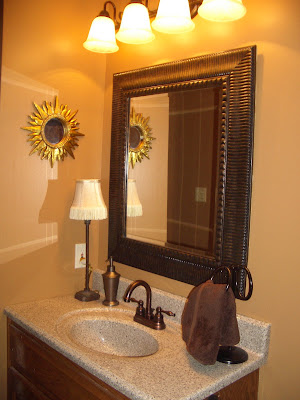
Earlier this spring, I shared with you some ideas I had for the guest bath. It had been a sore spot for me ever since I painted the bottom of the wall red. Now, normally I love red, but it just didn't work for me in here. We finally decided to paint the room "Bronco Brown" by Porter Paint. I wasn't sure about this color that my hubby had picked out, but as soon as I rolled it on the wall, I loved it.

The next step was the fun stuff: shower curtains, a new mirror, light fixture, and all the "pretties". I found the shower curtain at Wal-Mart:

The mirror and light fixture:

Now, when I say I'm a frugal decorator, I mean it. The metal piece over the towel bar was $6 at Dollar General, the picture was $5 (D.G.), and the wire basket was really expensive-$7-at WalMart (its actually a flower basket from the lawn and garden department!). The towel bars and holder are also from Wally World. The sunburst mirror was one I repurposed fromt he other bathroom. A rug from JCPenney and I was done. We love it!